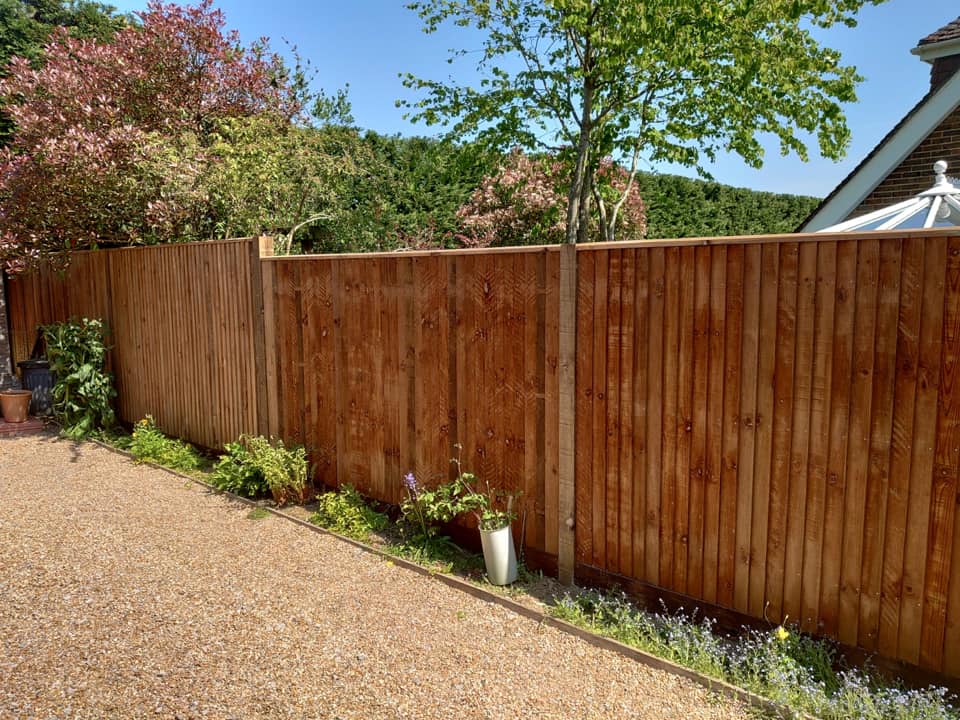
How to install Traditional Closeboard
A step-by-step guide
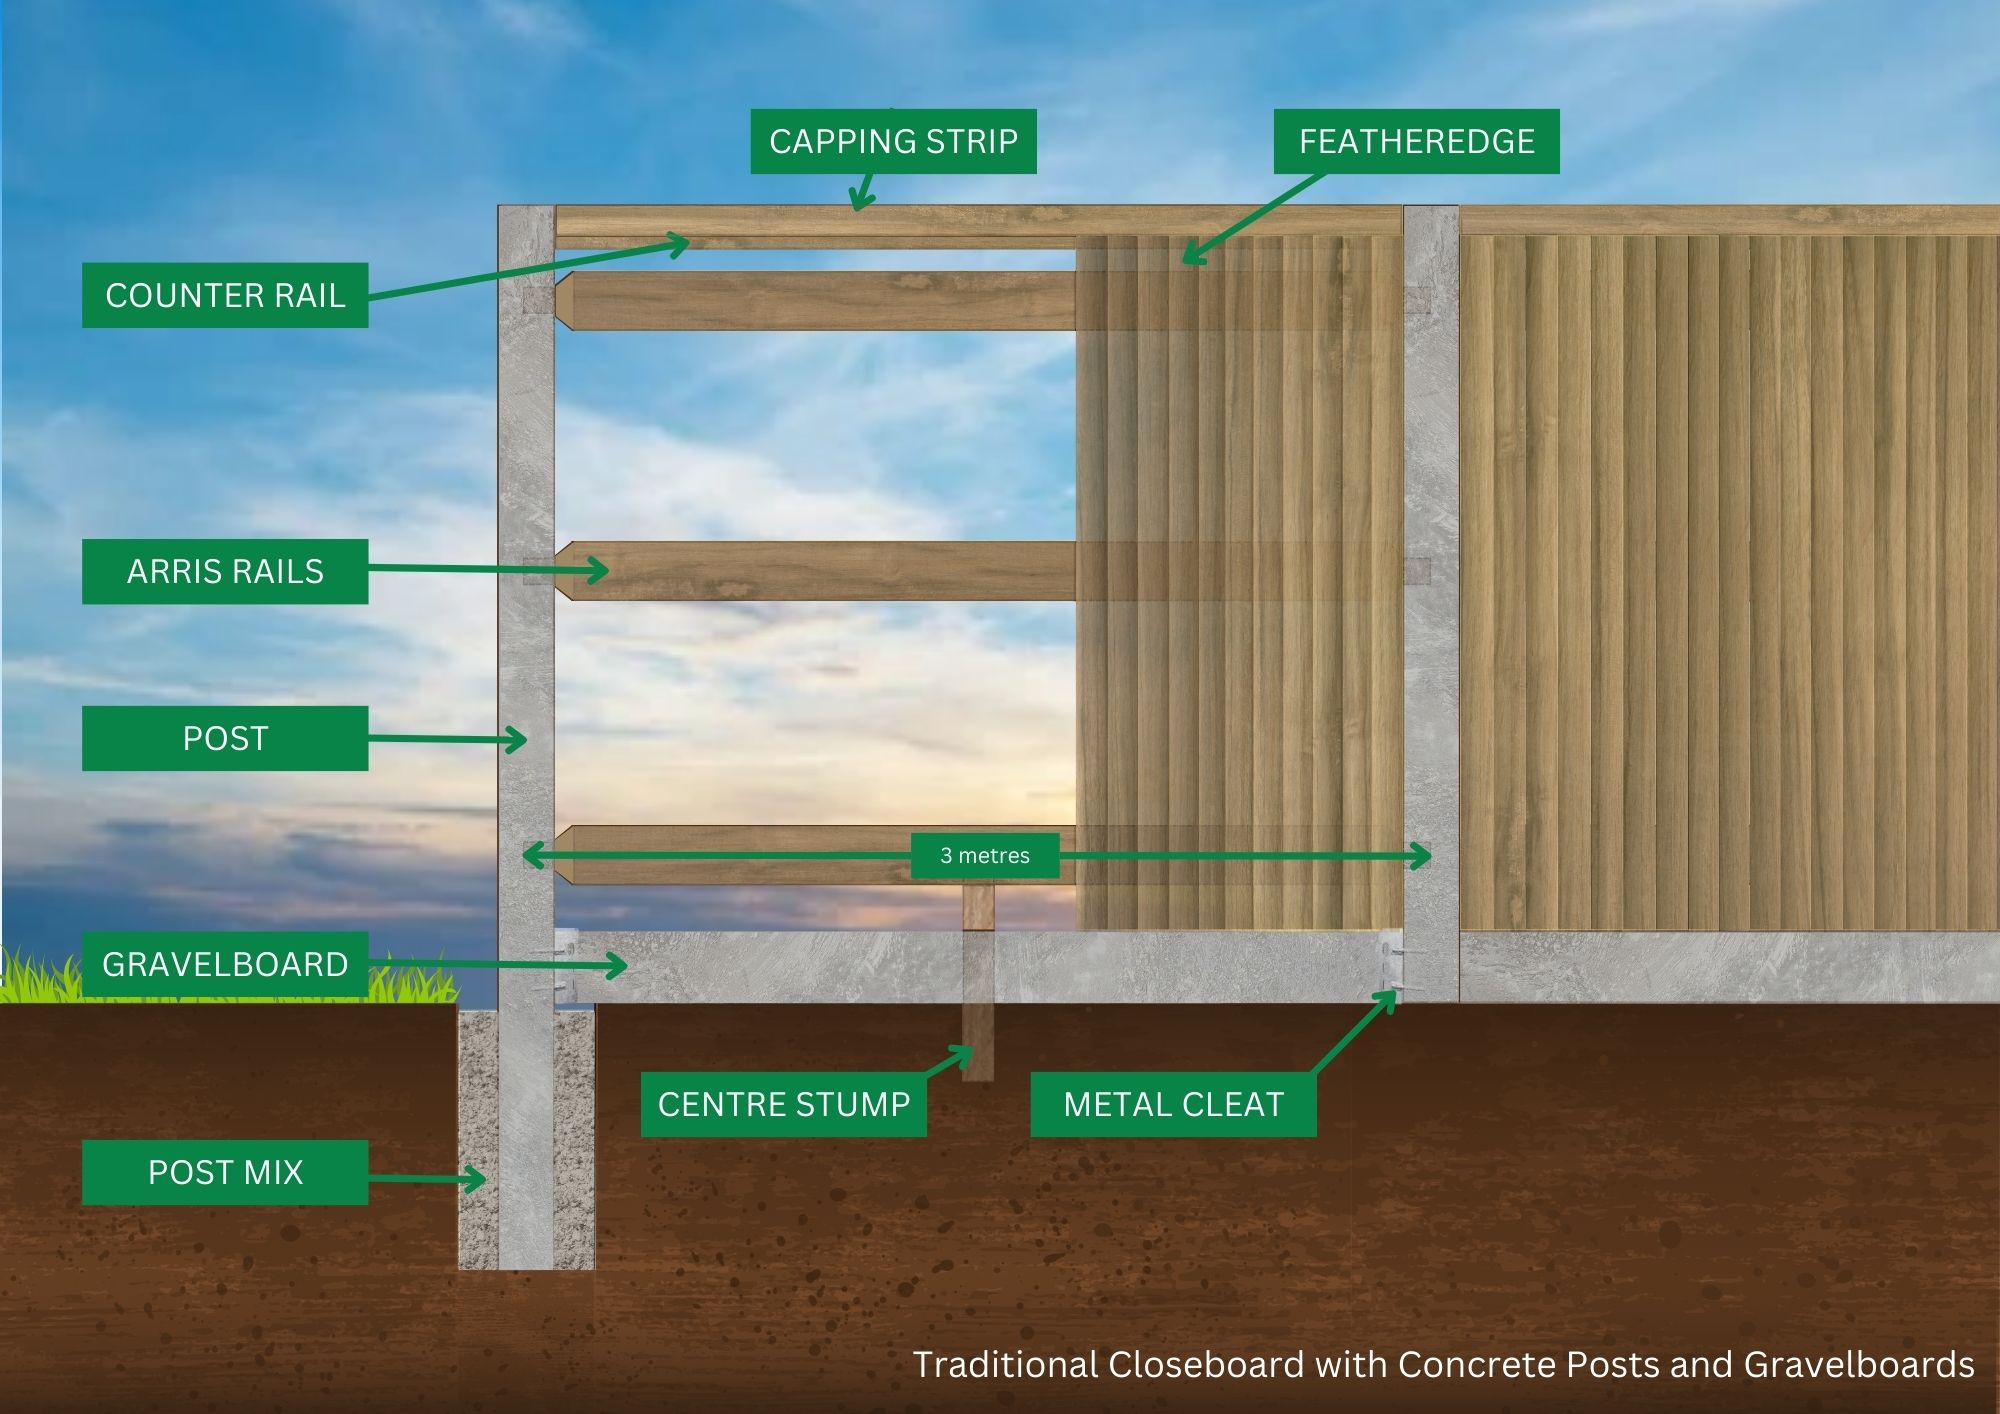
Key Components Needed
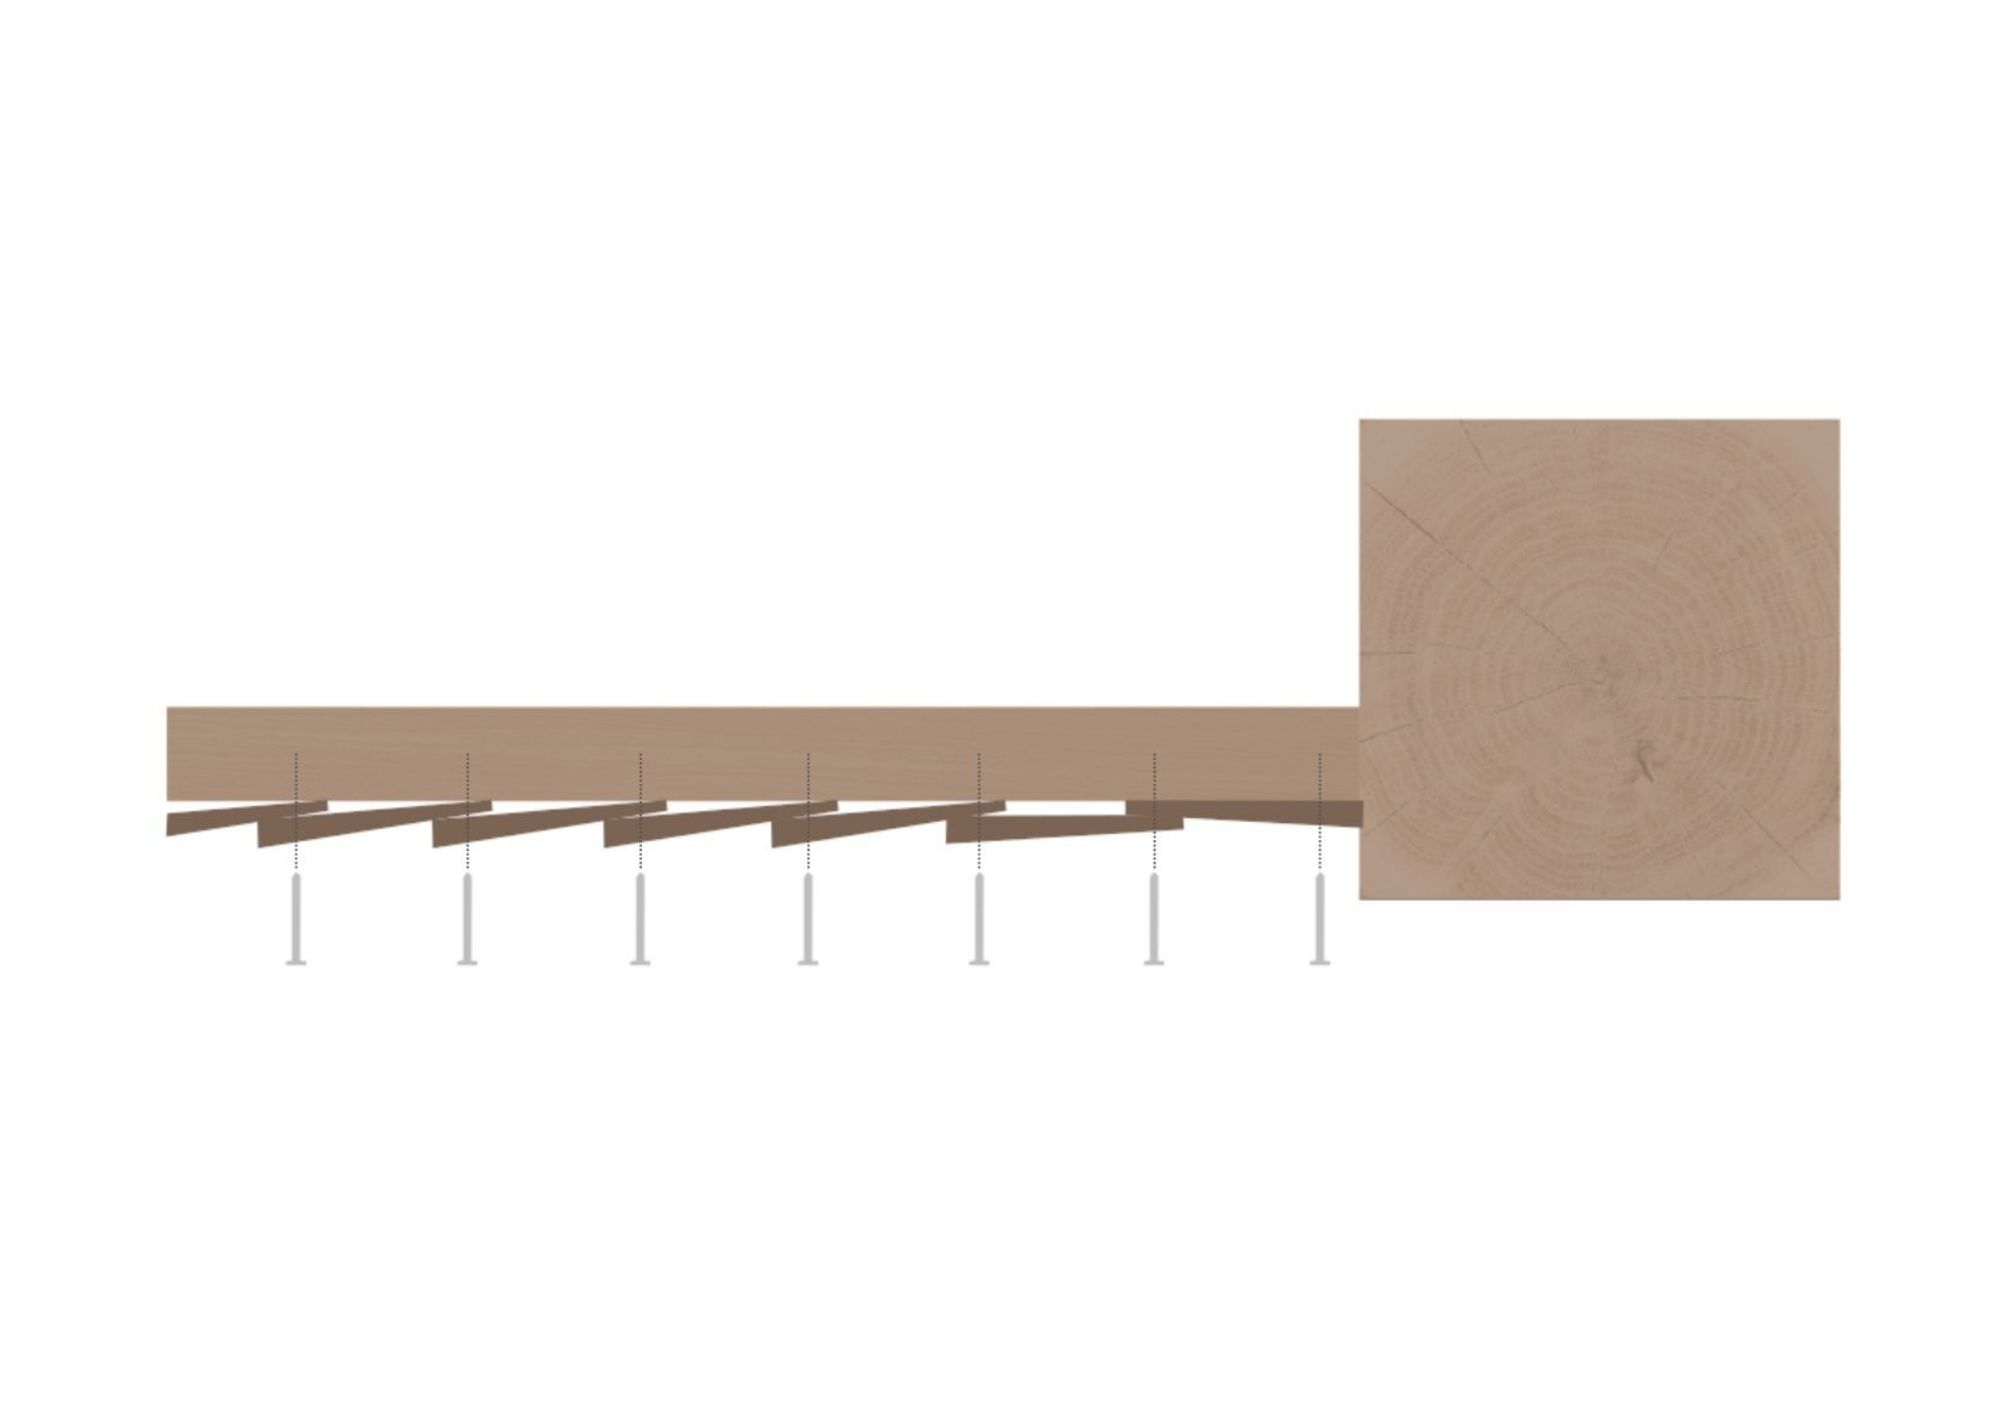
Featheredge Boards
These are thinner at one side to allow them to be overlapped and attach to the arris rails.
Arris Rails
Rails with a triangular cross section that run horizontally between the fence posts. Available ended (which fit into morticed fence posts) or un-ended (typically used for fencing repairs with arris brackets).
Morticed Fence Posts
Closeboard fencing can be erected using either timber or concrete fence posts. We stock timber posts morticed for a 6ft (1.8m) total height fence but if you are in need of different lengths posts please contact us to go through your requirements. Our concrete posts come at a variety of different lengths from 5ft (1.5m) to 9ft (2.7m).
Gravel Boards
As with fence posts we stock both timber and concrete gravel boards. These are used to protect your fence from moisture damaged from wet ground to ensure that your fencing lasts as long as possible.
Centre Stumps
Pre-cut angled timber posts which support the bottom arris rail and is an essential strengthening component of traditional closeboard fencing.
Cleats
These are used to attached gravelboards onto fence posts.
Galvanised Nails – 50mm
Used to attached the featheredge boards to arris rails. We sell these in 1kg bags or 5kg and 10kg Tubs.
Post Mix
Goes off in between 5 – 10 minutes. We recommend 1.5 – 2 bags per post depending on ground conditions.
Planning and Preparation
How many posts and rails do I need?
The first stage of setting up a closeboard fencing is calculating your component quantities. (If you are unsure about this you can always contact us and speak with our knowledgeable staff). It’s essential to calculate the number of bays and posts accurately. By dividing the total fence line measurements by 3, you can determine the number of bays required. For instance, a 30m fence line would need 10 bays, with a post at each end, totalling 11 posts needed for installation.
The height of your fence dictates the number of horizontal arris rails. For a fence up to 5ft (1.5m) total height use two rails, and for anything taller use three rails.
How many featheredge boards do I need?
Generally, we would recommend 13x featheredge boards per metre of fencing.
These quantities are approximate as the overlapping of the featheredge may vary so it’s always a good idea to order a few extra boards.
Preparing the fence line.
If your fence line is clear, then perfect! If not, then remove any obstructions (old posts, tree roots etc) or any issues that may prevent you from digging a hole for a post.
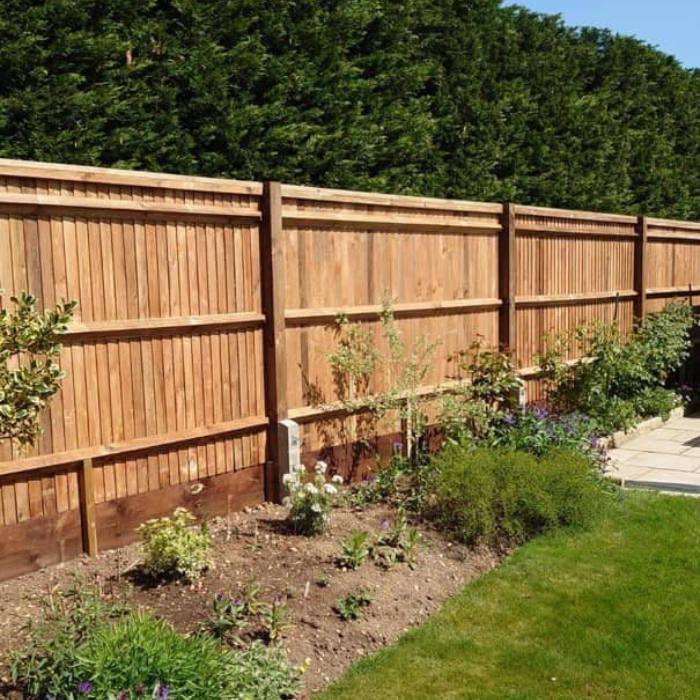
Installing you Fence
Follow these quick pointers when installing your new fence. If you need any more detail, please contact us and we shall help you the best we can.
- Dig the hole for the first post at a suggested depth of 2ft (600mm). [Recommend tools: grafts and post hole diggers for ease of digging]. Use a spirit level to check the post is vertical then back fill with post mix and any hard core that came out the hole.
- Run a string line from the first post to the end of the fencing and stretch it taut. Measure along this line and dig the next hole.
- Place the next post in the hole (BUT don’t back fill). Fit the arris rails in the mortices then once level concrete in place.
- Repeat this procedure for the remainder of the fence line.
- Once the posts are set, you can fix the gravel boards into position using cleats (either wooden for timber gravel boards or galvanised two pin for concrete) and centre stump to support the bottom arris rail.
- Now you can nail your featheredge into place. (Use our diagram for reference on how to fix your boards onto the arris rails). If you are nervous about the spacing of your featheredge, why not try using our TidyFence fence board spacer.
- Optionally you can now add post caps, counter & capping.